Adding Custom Categories and Locations
Customize Your Storefront | Organize Your Products
Once your store is set up and products have been added, you can customize your storefront to make it your own! Create custom categories for your products to keep everything organized and make it easier for customers to browse.
Enable Custom Categories
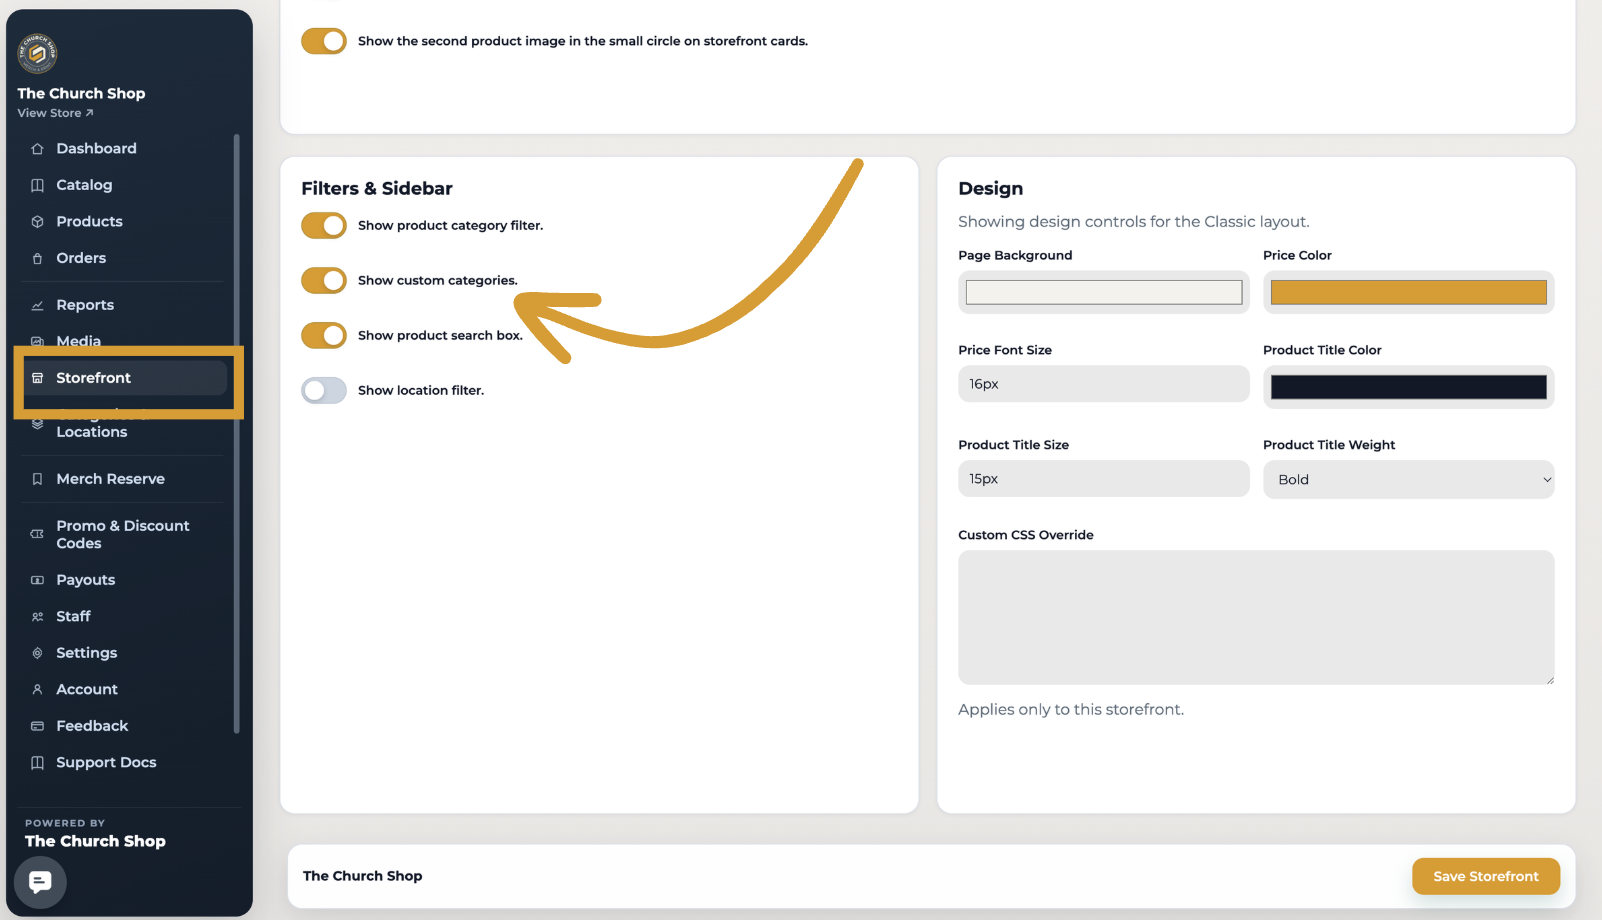
From your dashboard, go to Storefront > Layout + Design.
Make sure Show Custom Categories is turned on.
Add Products to Custom Categories
From your sidebar, go to Products.
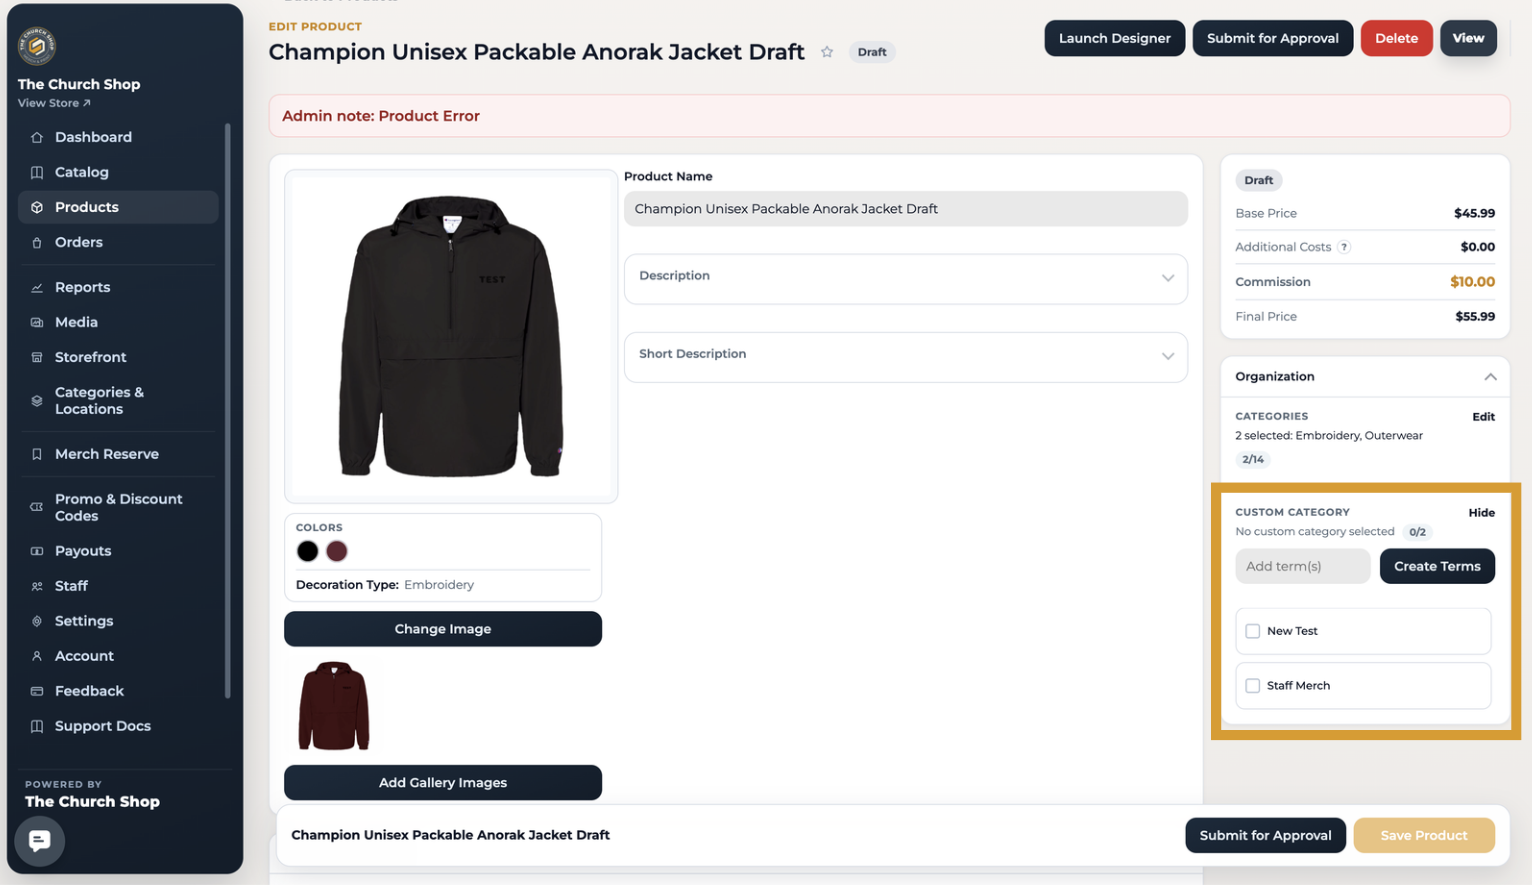
Select the product you want to add to a custom category.
Scroll down to the category section and choose the category you want to assign the product to.
You can also create a new category directly from this section.
Click Save Product once finished.
Edit or Remove Categories
From your sidebar, go to Categories and Locations.
From here, you can create new categories, edit existing ones, or remove categories as needed.
View Your Custom Categories
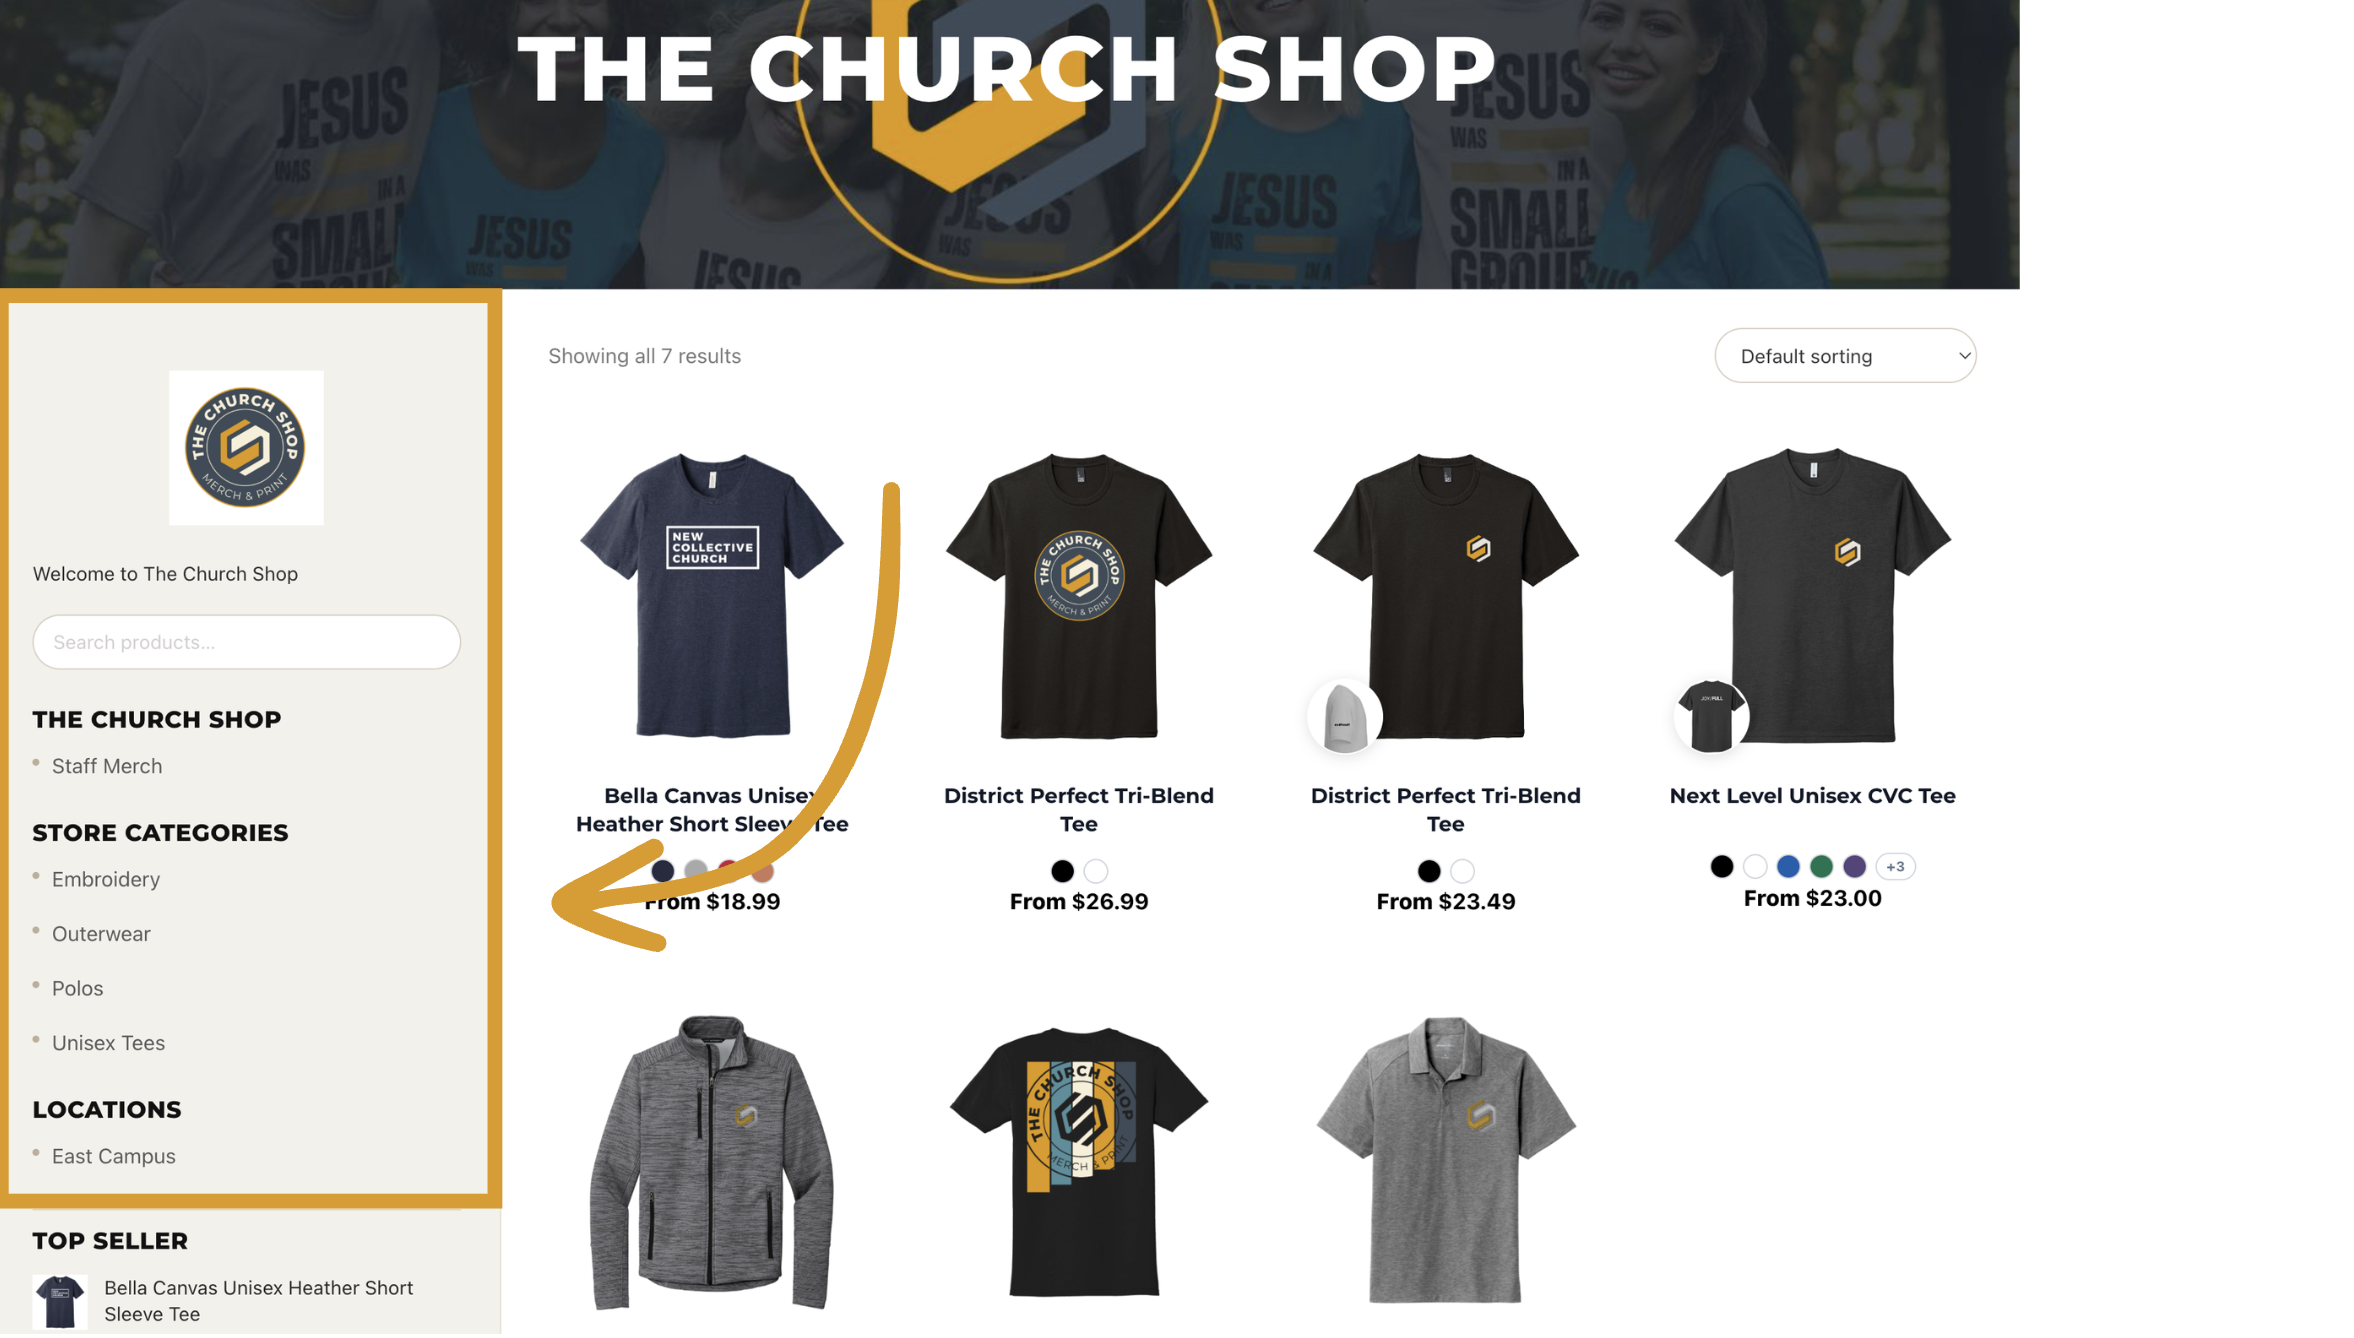
Visit your storefront to see your custom categories displayed in the left panel below your store logo.
Adding Locations
You can now organize your products based on their locations! This makes it easier for shoppers to find the right items for the right locations.
Steps to Add a Location
Access your dashboard and go to Products.
Select the product you want to assign to a custom location.
Under Locations, click Add/Remove Categories.
Visit your Storefront, the location will appear in the left panel below your store logo.
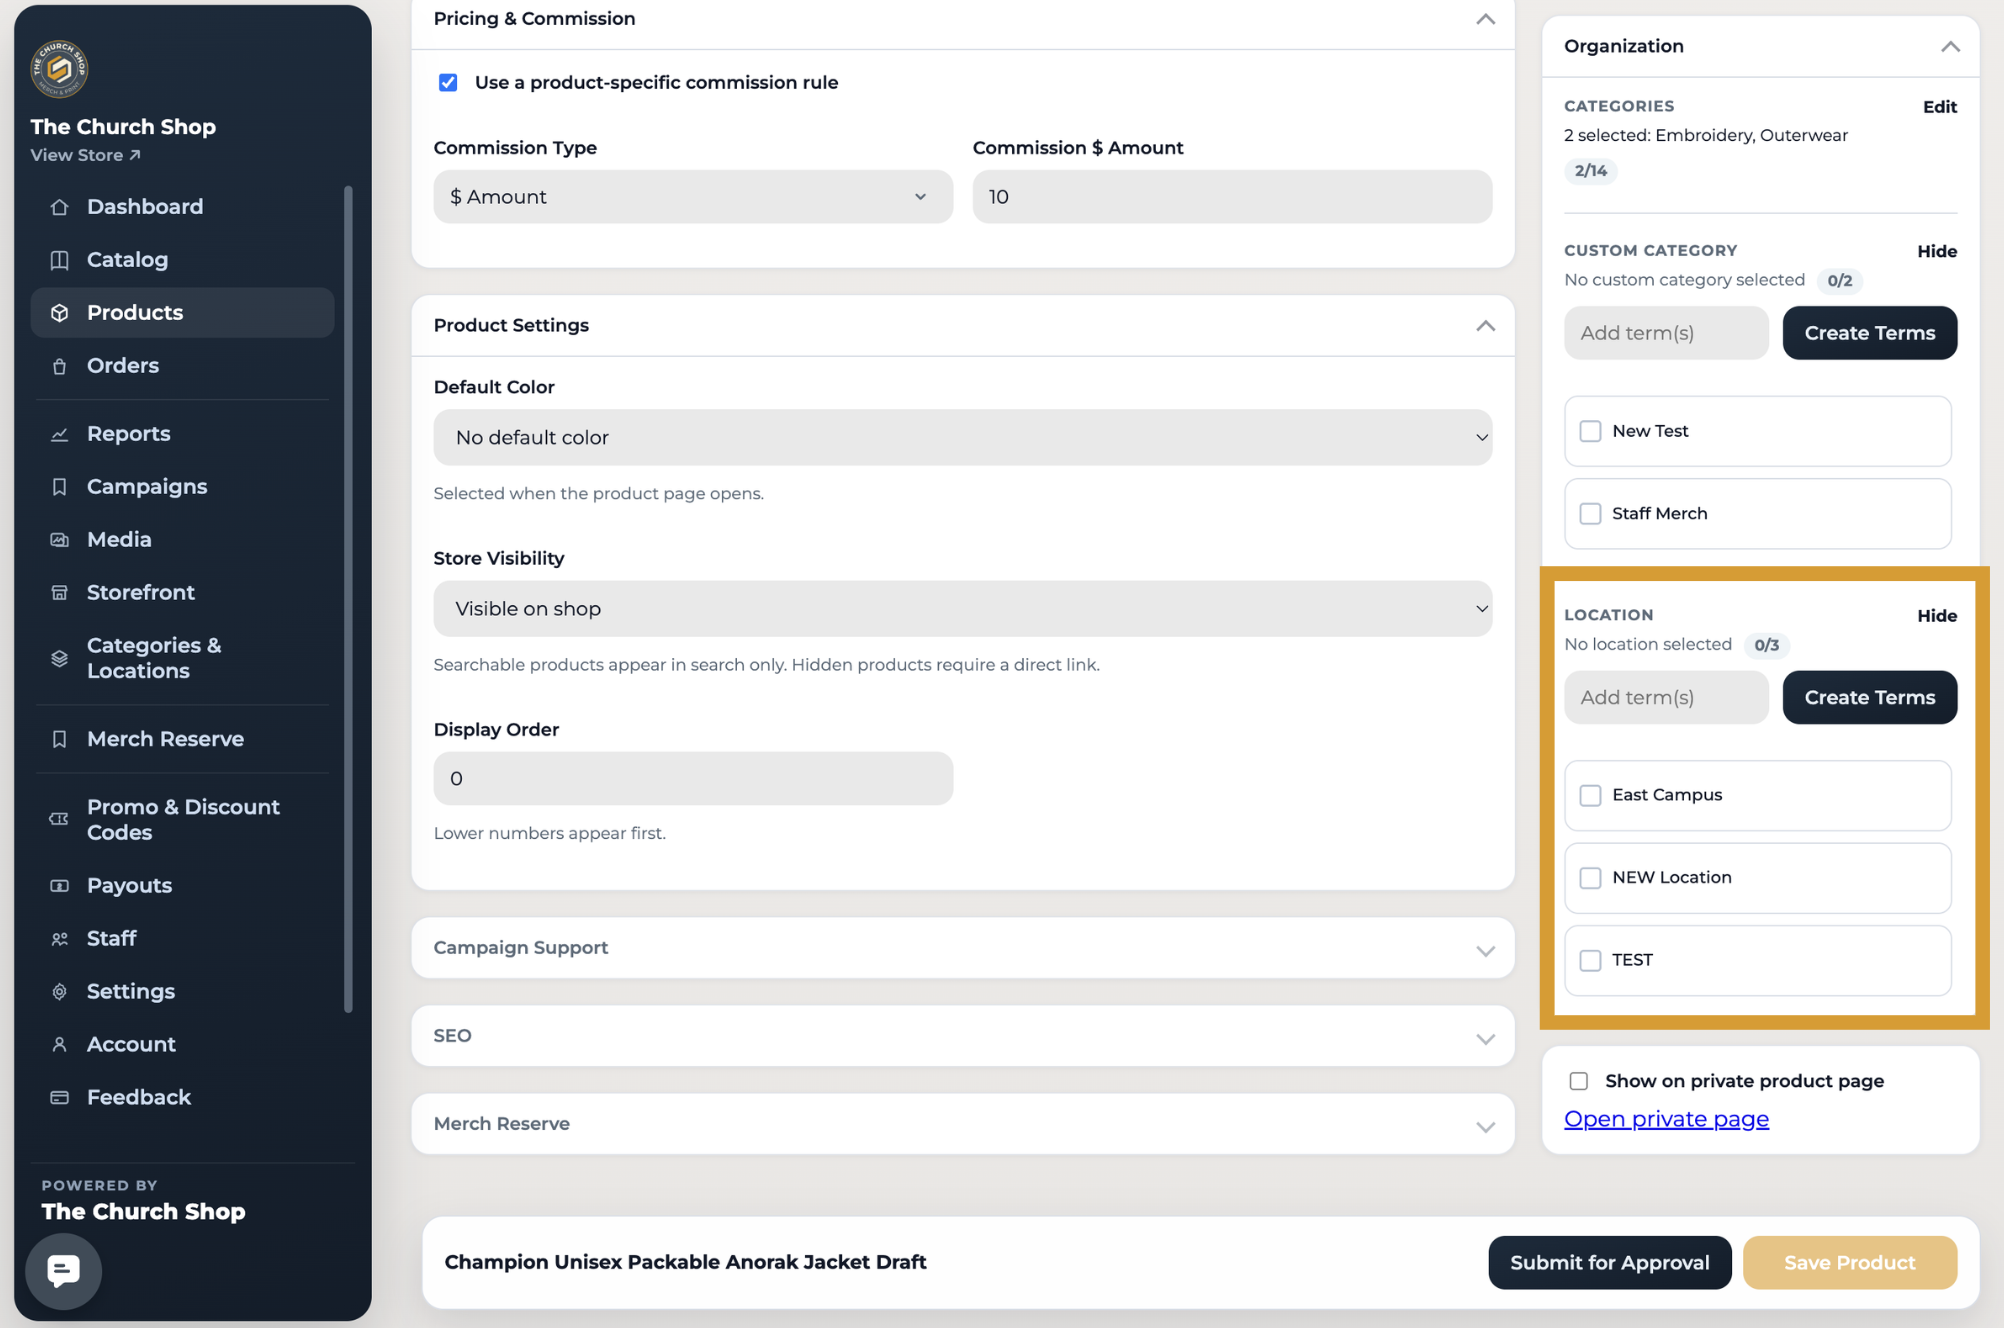
NOTE: You can add custom categories for new products after adding a design. These categories will be updated once your product has been submitted for review and approved.
📩 Questions?
Feel free to reach out to our team. Email us anytime at support@thechurch.shop, and we’ll be happy to help!